User Guide
Comprehensive documentation for dispatchers & supervisors
Welcome to the SMSMgr (Driver SMS Manager)! This application is designed to help dispatchers and supervisors efficiently communicate with their driver teams via SMS.
Table of Contents
1. Getting Started
Login
Access the application via your web browser. You will be presented with a login screen.
- Enter your Username (email) and Password.
- Click Login & Start Messaging.
- First time setup? Use the default admin credentials provided by your administrator
(often
admin/admin).

Initial Setup (First Run)
If no existing driver database is found, you will see a "Get Started" prompt.
- Click Choose Excel File.
- Select your driver roster file (
.xlsxor.xlsformat).
Note: The Excel file must contain columns for Name, Phone, and Team. - Once uploaded, the dashboard will populate with your driver teams.
2. Dashboard Overview
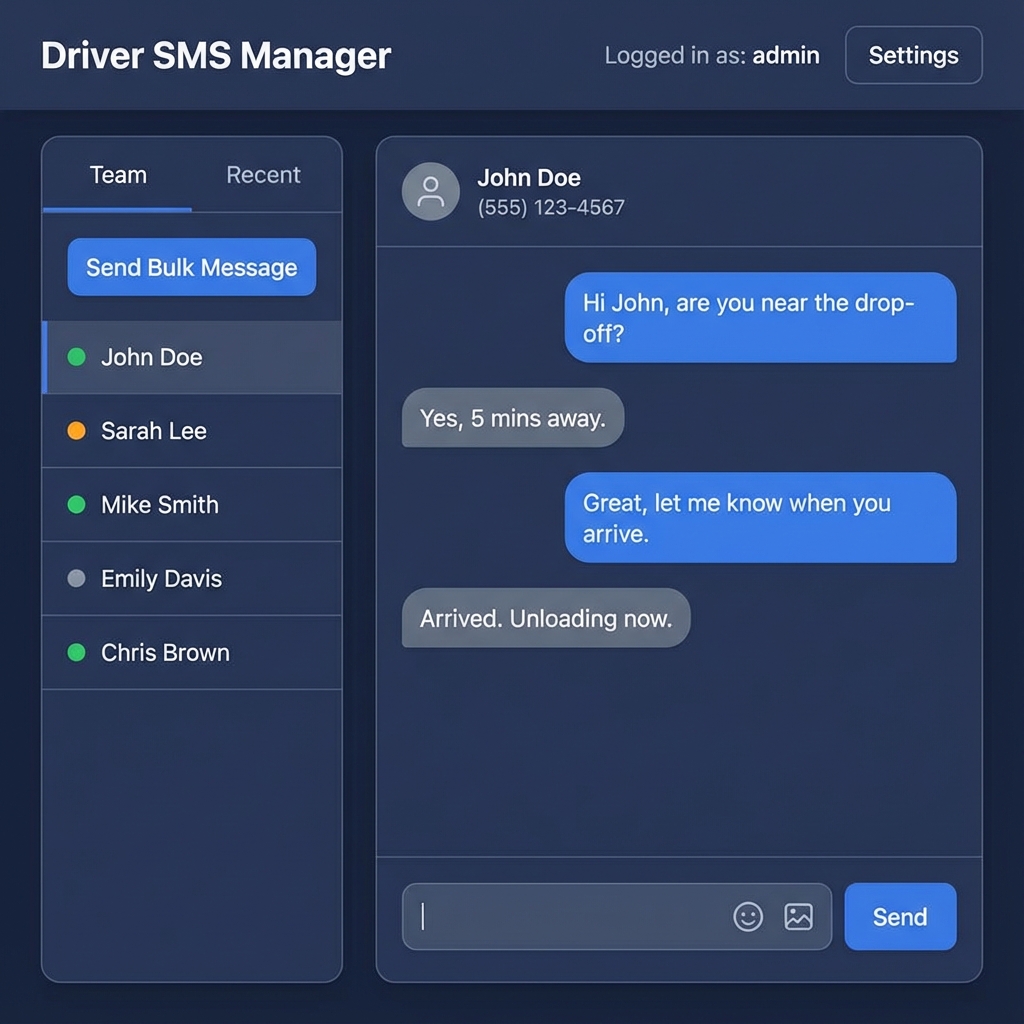
The dashboard is divided into two main sections:
- Left Column: Driver & Team Management
- Search bar to find specific drivers.
- Team selector dropdown.
- Driver list with status indicators.
- Quick action buttons (Send Bulk Message, New Message).
- Right Column: Conversation Panel
- Displays the chat history with the selected driver.
- Message input area with emoji picker and image attachment.
- Results panel showing delivery status of bulk messages.
3. Managing Drivers
Viewing Drivers
- Teams: Use the dropdown menu at the top left to filter drivers by specific teams (e.g., "North Team", "Night Shift").
- Sorting:
- Recent: Sorts by most recently messaged.
- My Recent: Sorts by drivers you specifically messaged recently.
- Name: Alphabetical order.
- Team: Groups drivers by their assigned team.
- Search: Type a name or phone number in the search bar to instantly filter the list.
Updating the Roster
To update the list of drivers (e.g., new hires, team changes):
- Go to Settings (⚙️ button in the header).
- Under "Update Driver List", click Choose Excel File.
- Upload the updated spreadsheet. This will replace the current list.
4. Sending Messages
Individual Messages
- Click on a driver's name in the list.
- The conversation panel opens on the right.
- Type your message in the input box.
- Use the 😊 button for emojis.
- Use the 📷 button to attach an image.
- Toggle Add signature to append your name to the message.
- Click Send or press
Enter.
Ad-Hoc Messages
To message a number not in your driver list:
- Click ➕ New Message in the left column.
- Enter the Phone Number (include country code, e.g., +1...).
- (Optional) Enter a Name for temporary reference.
- Click Start Conversation.
Bulk Messages
Send a broadcast message to an entire team or all drivers.
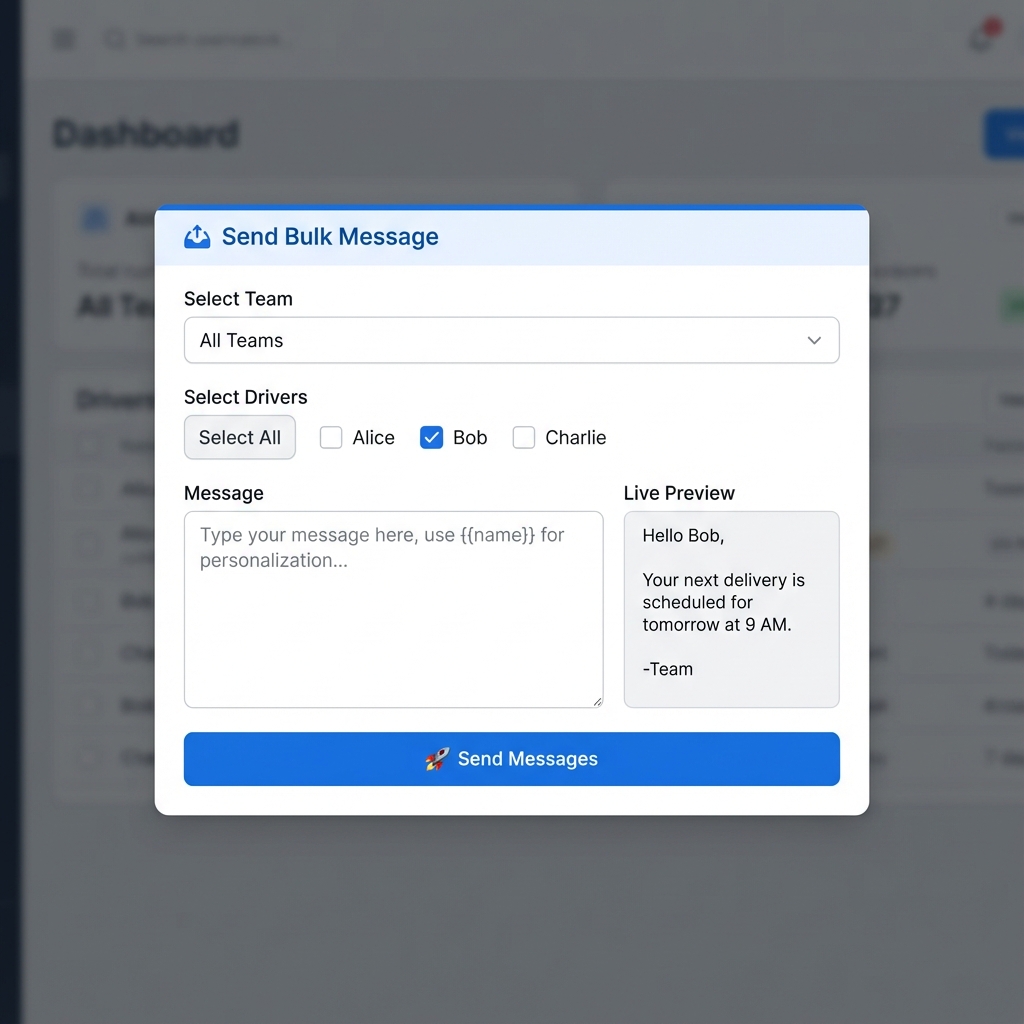
- Click 📤 Send Bulk Message.
- Select Team: Choose a specific team or "All Teams".
- Select Drivers: You can manually uncheck specific drivers if needed.
- Compose Message: Type your message.
Variables: Use{firstName},{name}, or{team}to personalize the message. - Preview: Check the "Live Preview" box to see how it looks.
- Click 🚀 Send Messages.
5. User Management
Access: Admin & Supervisors only
- Click the 👥 Users button in the header (visible if you have permissions).
- Add New User:
- Enter Username (email), Password, Role (User, Supervisor, Admin), and Company.
- Color: Assign a unique color. This color will identify messages sent by this user in the chat history.
- Edit User: Click on an existing user to modify their details.
6. Settings
Click the ⚙️ Settings button to customize your experience.
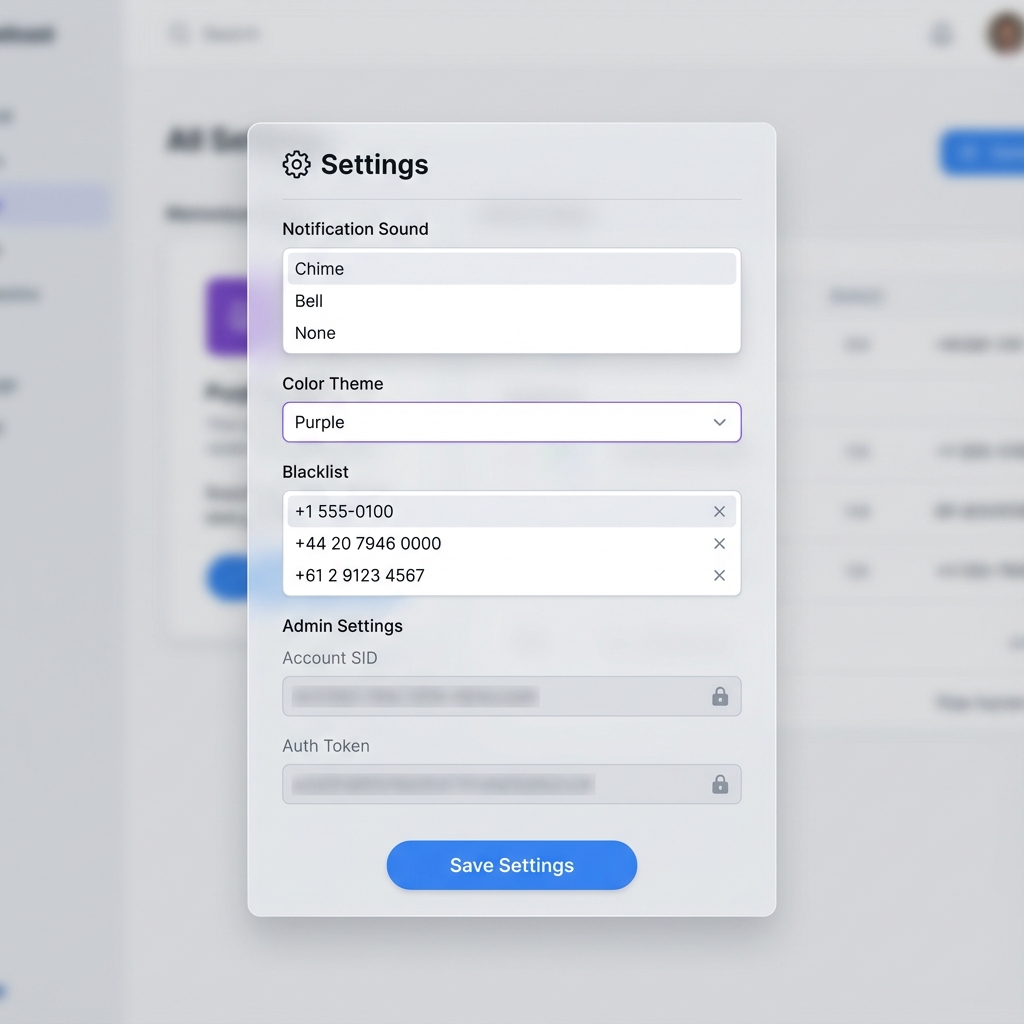
- Notification Sound: Choose a sound to play when a new message arrives.
- Color Theme: Change the look of the app.
- Blacklist: View numbers that have replied "STOP".
- Cloud Sync: Manually sync your local message history to the cloud.
- Admin Settings (Locked): Manage Twilio credentials.
7. Troubleshooting
- Messages not sending? Check internet connection and Twilio credentials in Settings.
- Drivers not loading? Ensure Excel file has correct headers (Name, Phone, Team).
- No notification sound? Click anywhere on the dashboard after loading to enable audio.
- "Logins don't match" error? Clear browser cache or use Incognito mode.